When it comes to interior construction, drywall and taping play a crucial role in creating smooth, polished walls and ceilings. At Toronto Drywall and Taping, we pride ourselves on providing top-notch services in the Toronto and GTA area. In this comprehensive guide, we’ll walk you through the essentials of drywall installation and taping, shedding light on the techniques, materials, and expert tips that ensure exceptional results.
Understanding Drywall: The Foundation of Great Interiors
Drywall, also known as plasterboard or wallboard, forms the foundation of most modern interior walls and ceilings. It’s a versatile and cost-effective material that offers a smooth surface for painting or wallpapering. Here’s what you need to know:
Choosing the Right Drywall Type
Not all drywalls are created equal. When embarking on a construction project, selecting the appropriate drywall type is crucial. Standard drywall is ideal for most applications, but moisture-resistant and fire-resistant options are available for areas prone to humidity or fire hazards.
Drywall Sizes and Thickness
Drywalls come in various sizes and thicknesses. The most common thicknesses include 1/2 inch and 5/8 inch. Thicker drywalls offer better soundproofing and fire resistance, making them suitable for shared walls and ceilings.
Installing Drywall: Step-by-Step
- Preparation: Measure and cut drywall sheets to fit the designated area.
- Marking: Mark stud locations on the floor and ceiling to guide the installation process.
- Attaching: Secure the drywall sheets to the studs using drywall screws or nails.
- Taping and Mudding: Cover the seams and screws/nails with joint compound (mud), and apply drywall tape to create a seamless surface.
- Sanding: Once the mud dries, sand the surface until it’s smooth and even.
- Priming and Painting: Apply primer to the drywall before painting for better adhesion and a flawless finish.
The Art of Taping: Creating Seamless Joints
Taping is a skilled technique that involves covering the joints and seams between drywall sheets to create a uniform surface. Here’s what you should know:
Types of Drywall Tape
- Paper Tape: Traditional and cost-effective, paper tape requires embedding in joint compound for a strong bond.
- Mesh Tape: Self-adhesive mesh tape is easier to apply, but may require more layers for a smooth finish.
- Fiberglass Tape: Resistant to mold and moisture, fiberglass tape is ideal for bathrooms and kitchens.
Taping Process Demystified
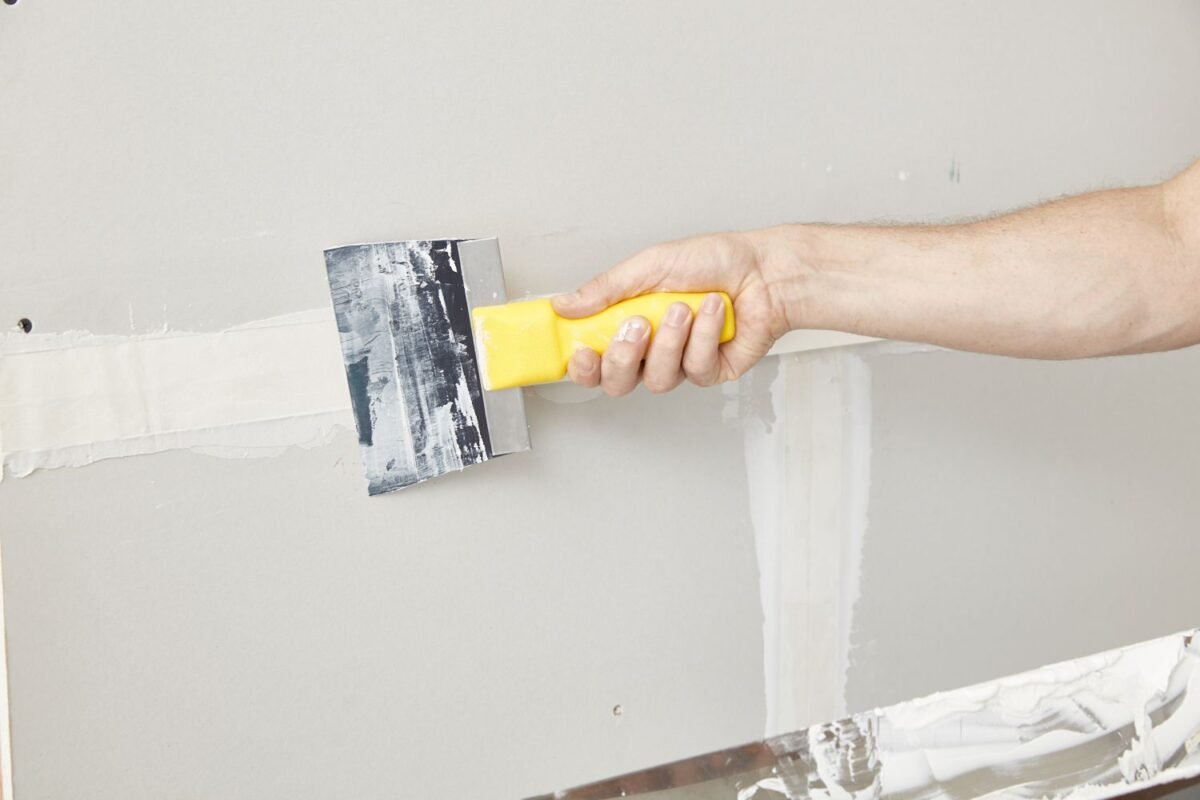
- Apply First Coat: Using a taping knife, embed the tape in a layer of joint compound.
- Second Coat: Apply a second coat of joint compound, feathering the edges to blend with the drywall.
- Third Coat: For a flawless finish, apply a third coat, feathering further out to achieve seamless joints.
- Sanding: Gently sand the area until it’s smooth to the touch.
Pro Tips for Perfect Taping
- Use Thin Coats: Applying thin, even coats of joint compound reduces the need for excessive sanding.
- Feather Edges: Feather the edges of each coat to create a gradual transition between the taped area and the drywall.
- Quality Tools: Invest in high-quality taping knives and sandpaper for professional results.
FAQs about Drywall and Taping
Q: How long does it take for joint compound to dry? A: Drying time varies depending on factors like humidity and thickness. Typically, it takes 24 to 48 hours.
Q: Can I install drywall myself? A: While it’s possible for DIY enthusiasts, professional installation ensures a flawless finish.
Q: What’s the purpose of corner beads? A: Corner beads reinforce outside corners, providing a clean edge and preventing damage.
Q: Is sanding necessary between coats of joint compound? A: Yes, light sanding ensures a smooth surface for subsequent coats.
Q: How can I repair small holes in the drywall? A: Use spackling compound or a patch kit for minor repairs.
Q: Should I prime before taping and mudding? A: Priming before taping can help the compound adhere better to the drywall.


